


If your bike is really hard to pedal, and it feels like you’re pedaling at full effort but barely moving, even on flat ground or downhill, something is clearly wrong. A properly functioning bicycle should roll easily. When it doesn’t, mechanical resistance is stealing your energy.
The good news is that most of the causes of bikes becoming too hard to pedal are fixable. Some you can fix by yourself, and for the more complicated ones, you may need to visit the bike repair shop. Once you can detect the problem, fixing it should be easy.
Top 8 Reasons Why a Bike Might Be Too Hard To Pedal
1. The Tires are underinflated.
Underinflated tires are, by far, the most common reason for a bike being too hard to pedal. In fact, if your bike feels“dead,” slow to accelerate, heavy, and especially harder to pedal on smooth pavement, the tires are very likely underinflated.
This happens because tires naturally lose air over time. Many people unknowingly ride well below recommended tire pressure levels.

How to fix it
- Inflate tires to the PSI listed on the sidewall
- Check pressure weekly
When you notice your bike getting harder to pedal, always check the tire pressure. Even slightly low tire pressure creates huge rolling resistance and will make your bike feel slow everywhere, including downhill.
This is why learning how to pump your bike tire is a must. Low tire pressure is the simplest fix with the biggest payoff.
2. The Brakes Are Rubbing (Including Frame Flex Under Load)
If your bike is really hard to pedal, and you keep hearing a scraping noise when pedaling, especially when climbing or standing up, it is very likely because the brakes are rubbing.
The brake calipers may be misaligned, or the frame flexes slightly under pedaling force, causing contact.

How to fix it
- Recenter brake calipers
- Check pad clearance
- Upgrade worn brake components if needed
This is one of the most common and overlooked causes of a bike being too hard to pedal. Misaligned pads, sticky calipers, or light frame flex cause constant drag that many riders don’t notice until it’s fixed.
Related: How to fix brakes on a bicycle.
3. Hub and Bottom Bracket Bearings Need Greasing
Resistance feels gradual and inconsistent rather than sudden. Old grease dries out, increasing friction inside rotating parts.
How to fix it
- Disassemble, clean, and regrease bearings
-
Replace seals if damaged
Routine maintenance prevents this entirely.
Old or contaminated grease increases friction gradually, making the bike feel heavier over time and, therefore, harder to pedal.

4. The Wheel Bearings Are Too Tight
If riding your bike feels sluggish, and coasting distance is short, there is a very high chance that your wheel bearings are too tight.
You can confirm this by taking the bike off the ground and spinning the wheels: if they stop quickly instead of spinning freely and coming to a slow stop, the wheel bearings are too tight.
How to fix it
Wheel bearings can be overtightened during assembly or a repair. In some cases, poorly adjusted cone nuts compress the bearings too much. Take the following steps to fix this problem:
- Loosen the axle cones slightly
- Ensure smooth rotation without side-to-side play
This often happens after DIY repairs or shop adjustments are done too aggressively. If you are unsure, a bike shop can adjust this quickly.

5. The Bottom Bracket Bearings Are Too Tight
If pedalling is hard to the extent that the resistance doesn't change with gears, then the bottom bracket bearings may be too tight. To test this, remove the chain and try to pedal again. If the pedal still feels stiff, the bottom bearings are likely too tight
Overtightened bottom brackets or improperly installed cartridge units restrict rotation at the crank.
How to fix it
- Check crank spin with the chain off
- Adjust or replace the bottom bracket
This is usually best handled by a mechanic unless you have the right tools. It is less common than wheel bearings, but very noticeable once it happens.
6. The Wheels Are Out of True
Wheels that are not true will keep wobbling side to side or rub intermittently against the brake pads or frame, which makes pedaling your bike really hard.
This mostly happens when the wheels are knocked out of alignment: you hit potholes, curbs, or ride with loose spokes.
How to fix it
- For minor wobbles, wheel truing at a bike shop will fix it.
- For severe bends, you might need a complete wheel replacement
Untrue wheels create constant drag, even if it’s subtle, and this will make your bike really hard to pedal.

7. The Wheels Are Misaligned in the Frame
Improper wheel installation, bent dropouts, or frame damage can throw alignment off, which will make your bike really hard to pedal. When this happens, the bike pulls slightly to one side, or the tire appears closer to one chainstay than the other.
How to fix it
- Reinstall the wheel properly
- Check frame alignment at a shop
Misalignment increases friction and also causes your tire to wear out faster. It is a problem that should be detected and sorted ASAP.
8. Worn Bearings, Cups, or Cones
If, in addition to your bike being really hard to pedal, you notice any grinding, clicking, or roughness when pedaling or spinning wheels, the bearings, cups, or cones might be totally worn out.
Worn bearings, cups, and cones happen when the bearings wear down over time, which is what happens if they go too long without regular maintenance.

How to fix it
- Replace worn bearings
-
Replace damaged cups or cones
Once pitting occurs, lubrication alone won’t fix it.
This is usually a problem on older bikes or those with high mileage and little maintenance.
When Hard Pedaling Means It’s Time to Change the Bike
When a bike is too hard to pedal, it’s often because of a single issue that can be fixed or a part that can be replaced. However, when the problem isn’t just one issue but several at once, it’s usually wiser, safer, and more cost-effective to replace the bike.
You should seriously consider replacing the bike if:
- Multiple components are worn or damaged
- Repair costs approach or exceed the bike’s value
- The frame is bent or misaligned
- Replacement parts are no longer available
- The bike was of very low quality to begin with
If you’re constantly fighting resistance despite repairs, the bike is no longer serving you. At that point, you’re maintaining problems, not solving them.
What to Look for in a New Bike So It’s Easy to Pedal
If you’re replacing your bike or buying one after years away, prioritize efficiency and reliability, not just looks.
- Smooth, Sealed Bearings: Sealed hub and bottom bracket bearings resist dirt and require less maintenance.
- Proper Tire Size and Quality: Larger tires with correct pressure roll faster and more comfortably than cheap, underinflated ones.
- Correct Bike Fit: A bike that’s too small or too large makes pedaling inefficient and tiring. Reading a bike size chart is the first thing to do when buying a bicycle.
- Quality Braking System: Well-aligned brakes with good clearance reduce drag and improve safety.
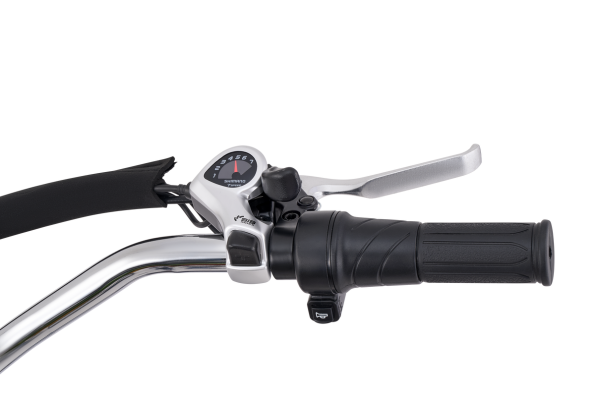
- Reasonable Gearing: Lower gears make starts and hills easier without forcing excessive effort.
- Rigid, Well-Built Frame: A stiff frame transfers pedaling power efficiently, rather than flexing under load.

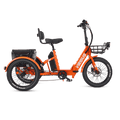
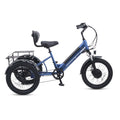
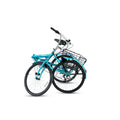
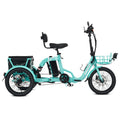
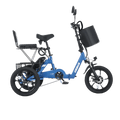
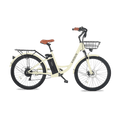
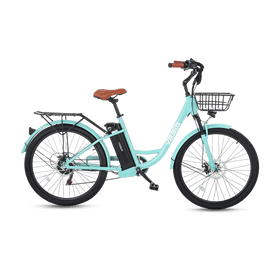
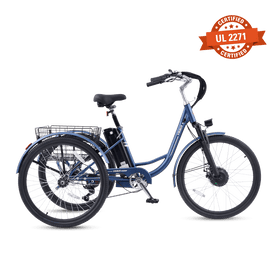
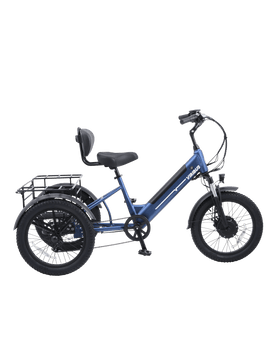
Reliable Bikes From Viribus
Viribus's collection of bicycles, including mountain bicycles and cruising bicycles for women, features regular bicycles and electric bicycles with firm and solid mechanical disc brakes with 7-speed gearing systems and well- built carbon steel/ aluminum frames.
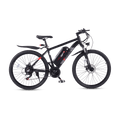
Check out the Viribus Panther Electric Mountain bike for a model built for rigidity and durability, and for conquering challenging terrain in any rural or urban setting.
Bike Chain Keeps Falling Off Front Chainring: Causes and How to Fix It
If your bike chain keeps falling outward, specifically over the largest ring, it happens because the derailleur is pushing the chain too far to the outside. To fix this, you need to check the height and alignment of the derailleur. Follow these steps:
-
Tighten the H-limit screw: Locate the screw marked "H" on top of your front derailleur. Turn it clockwise one half-turn at a time. This physically restricts how far outward the derailleur cage can move.
-
Check the derailleur height: Shift to the smallest ring. The outer plate of the front derailleur cage should sit exactly 1 to 3 millimeters (about the thickness of a penny) directly above the tallest teeth of your largest chainring. If it is too high, it won't guide the chain properly.
-
Check derailleur alignment: Look straight down at the derailleur. The outer plate of the cage must be perfectly parallel to your chainrings. If it is twisted inward or outward, it will throw the chain off.
If The Chain Falls Off Inward (Onto the Frame)
If the chain falls inward, onto the frame, this usually happens because the derailleur is moving too far inward toward the bicycle frame.
-
Tighten the L-limit screw: Locate the screw marked "L" on your front derailleur. Turn it clockwise one half-turn at a time. This prevents the derailleur cage from moving too close to the frame.
-
Check cable tension: If your cable is completely slack when you are in your easiest gears, the derailleur can drop too quickly and throw the chain. Use the barrel adjuster on your shifter to add a small amount of tension.

Bike Chain Keeps Falling Off (Single Speed vs Multiple Speed Bikes)
1. For Single-Speed, Fixed-Gear, or Coaster-Brake Bikes
If your bike does not have gear shifters, the chain usually drops because it has stretched over time, or the rear wheel has slipped forward, creating too much slack.
To fix this, you need to check the slack, adjust the wheel position, and check the chainline. Follow these steps:
- Check the slack: You should only be able to move the chain up and down about \(1/2\) inch in the middle. If it hangs loosely or flaps, it will pop off easily.
- Adjust the wheel position: Loosen the axle nuts on your rear wheel. Pull the wheel straight back into the frame dropouts until the chain is snug but not completely rigid. Hold the wheel straight and tighten the axle nuts firmly.
- Check the chainline: Stand behind the bike and look forward. The rear sprocket and front chainring must align in a perfectly straight line. If the wheel is crooked, the chain will pull off to the side.
2. For Bikes with Multi-Gear Shifters (Derailleurs)
If your bike has gears, the chain is usually falling off because a component is physically limiting the chain too far, or components are worn out.
- If the chain falls off past the smallest gear or outside the biggest front ring, tighten the H screw clockwise.
- If the chain falls into the wheel spokes or off the smallest front ring toward the frame, tighten the L screw clockwise.
Check for a bent derailleur hanger
If you have crashed or the bike has fallen on its right side, the metal piece holding your rear derailleur might be bent inward. Crouch behind the bike; the derailleur cage should hang perfectly vertical and parallel to the gears. If it looks twisted, it needs to be straightened or replaced.
Check the derailleur clutch
If you are riding a modern mountain or gravel bike with a 1x drivetrain (one chainring in the front), ensure your rear derailleur clutch switch is flipped to the ON position. A loose clutch allows the chain to bounce off over rough terrain.
Bike Chain Falling Off Due to General Drivetrain Wear (For All Bike Chains)
Chains stretch mechanically as the internal pins wear down. A stretched chain won't mesh with the gear teeth and will slip or drop under heavy pedaling. To handle this, start with the worn teeth and focus on the stiff links or bent components.
- Worn teeth ("Shark finning"): Check the teeth on your front chainrings and rear cassette. If they look sharp, pointed, or worn down like shark fins rather than square or blunt, they can no longer hold the chain. You will need to replace the worn gears and the chain together.
- Stiff links or bent components: Spin the pedals backward slowly by hand. Watch the chain pass through the gears. Look for any kinked links that refuse to straighten out, or a front chainring that wobbles side-to-side, indicating it is bent.
 The Chain Keeps Falling Out During Heavy Pedalling: Why It Happens and How to Fix It
Since the chain drops during both shifting and heavy pedaling, you are very likely dealing with two separate but overlapping issues: incorrect derailleur limits, throwing the chain during shifts, combined with drivetrain wear or flexibility, letting it slip under load.
Step 1: Fix the Shifting Drops (Limit Screws)
If the chain drops while shifting, the derailleur is pushing too far. You need to adjust the physical limit screws using a screwdriver.
- If it drops outward (toward your right foot): Shift to the largest front ring. Look at the front derailleur and find the screw marked H. Turn it clockwise 1/4 turn at a time until the inner metal cage just clears the chain without rubbing, preventing it from overshooting the big ring.
- If it drops inward (toward the bike frame): Shift to the smallest front ring. Find the screw marked L. Turn it clockwise 1/4 turn at a time. This stops the derailleur from moving too close to the frame and dropping the chain inside.
Step 2: Fix the Heavy Pedaling Drops (Wear and Flex)
If the chain drops while pedaling hard, mechanical flex or worn parts are causing the chain to lift out of the gear teeth.
- Check for a "stretched" chain: Under heavy loads, a worn-out chain won't seat properly in the valleys of the chainring teeth. It rides up on the tips of the teeth and slips off. Use a tool like the Park Tool CC-3.2 Chain Wear Indicator to check it. If it is stretched past 0.75%, replace it immediately.
- Inspect for "Shark Fin" teeth: Look closely at your front chainrings. The teeth should be symmetrical and flat on top. If they are sharp, pointed, or hooked like shark fins, they can no longer hold the chain under load. You will need to replace the chainrings.
- Check for bottom bracket flex: Put your foot on one pedal and push hard sideways toward the frame. If the front chainrings wobble or flex significantly side-to-side, your bottom bracket (the axle assembly through the frame) is loose or worn out, which misaligns the chain under heavy pedaling.
Step 3: Check Derailleur Alignment
Shift gears and look straight down at the front derailleur cage. The metal plates of the cage must be perfectly parallel to your chainrings. If it got bumped and is twisted, the tail of the derailleur will push the chain off the rings when you put heavy pressure on the pedals.

Final Words on Bikes Being Too Hard to Pedal
If your bike feels impossibly hard to pedal, don’t blame your legs. Bikes are machines, and machines either roll smoothly or they don’t.
Most pedaling resistance comes from friction, misalignment, or neglect. Fix the source, and your speed and comfort return almost immediately. And if the fixes stack up too high, upgrading your bike isn’t giving up; it’s moving forward.
You might also be interested in understanding the technicalities and differences between mechanical and hydraulic disc brakes.


Leave a comment
All comments are moderated before being published.
This site is protected by hCaptcha and the hCaptcha Privacy Policy and Terms of Service apply.